Friday, November 19, 2010

Return Audit Results

After completing the work for the 2010 Home Energy Savings Program, we had our house audited again.

See related blog (http://wormmainea.blogspot.com/2010/08/home-efficiency-2010-continued-flir.html) for initial FLIR photos and discussion. Since the original audit we undertook a number of retrofits as discussed in related blogs

http://wormmainea.blogspot.com/2010/08/home-efficiency-2010-continued.html, http://wormmainea.blogspot.com/2010/09/air-sealing-top-and-bottom-of-house.html, http://wormmainea.blogspot.com/2010/10/water-heater-wrap-up.html,
http://wormmainea.blogspot.com/2010/11/air-sealing-electrical-outlets-on.html, and http://wormmainea.blogspot.com/2010/11/work-in-attic-air-sealing-and.html

The following show side-by-side photos before and after for same or similar areas of our home. Note that the temperature difference between inside and outside is greater now than when the audit was conducted back in August (44° vs. 65°) as compared to (82° vs. 95°). A greater difference inside vs. outside would mean that any air movement would show up more easily in the FLIR camera.

Before photo of the porch
After photo of the porch.
We didn't make any changes to the porch, so the photos are essentially the same.

Before photo of the attic hatch.
After photo of the attic hatch.
The attic hatch shows a dramatic reduction in airflow. In the recent photo you can see the bolts and wing nuts, but you don't see any air leaking.


Bert's office before.
Bert's office after
I think this photo is pretty impressive also. In the earlier photo, you can see air moving between the ceiling joists. In the current photo you don't.

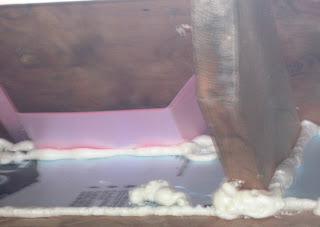
Basement sill before
Basement sill after
Here again, the movement of air was reduced. The difference in air flow for some of the areas is quite dramatic, but my overall airflow wasn't reduced by a whole lot as measured by the blower door. I was hoping for a really big reduction. I don't recall the exact number right now. Erik said this was to be expected to some extent. Our house was already pretty tight and it would take some more invasive work to drop it much lower. Nevertheless, we did control some important trouble areas-- like Bert's office and the work we did meets the minimum requirement for the rebate-- 25%*. That puts my ROI at between 6-7 years at current oil and electricity prices. 

* Erik said: "The final value for my home was 1585 CFM and the final savings [as calculated by the software] was 36%. I've mentioned a few times that EM's software is pretty generous but I'd be comfortable saying real world savings around 25% [that's the number I'm using]. Another question that may arise is whether the house is 'too tight' and that it 'needs to breathe'. The BTL (Building Tightness Limit; the engineered standard for necessary air flow) for your house was 1343 CFM50. That's the point at which you need to begin adding mechanical ventilation to make up for natural air flow. You can compensate with intermittent ventilation to 70% of BTL (940) after which dedicated continual ventilation is needed. So your house is well over the various air thresholds."

I can't wait to save money and be more comfortable this winter.

Cheers,

Mark

Sunday, November 7, 2010

Work in the attic: air sealing and insulating the soffits & adding more insulation

This is a job that I did not do myself. I had the work done by an expert to be sure it was done correctly with minimal damage to the exterior.

All work by Randy Vanier (Vanier Construction, Inc. 207-671-7454).

First, the problem: air infiltration into the house through the soffit and escaping from the proper vent (pink vent in the photos below) into the ceiling of the main floor. As shown in the photo below, Randy discovered that we had no insulation in the eaves either. Lots of work is needed to remedy this.

Surprise! No insulation. No wonder it is so cold in here.
To ensure proper air flow, Randy placed a proper vent in the space above that extended from the soffit area to above the insulation in the attic. As shown in the series of photos below, he then cut pieces of XPS foam insulation and used spray foam to hold everything in place and force any air to move through the vent into the attic space (rather than around it).

Test fitting the proper vent and rigid foam insulation.
Here is how the test fit looks from inside (before proper vent)

First step with spray foam behind foam board insulation and all cracks.
Everything spray foamed tight and sealed so air can only go into the attic space via the proper vent
A side view of the work, note this will be covered by the soffit so it is all hidden
Here's how it looks when finished

So that completes the air sealing the soffits. Next Randy added insulation in the eaves.


Randy was finished at this point, so I added some foam board insulation on top of the batts to make an insulated space that should make the bedrooms warmer and less drafty. 

Eave area with the foam board insulation and spray foam.
When budget permits, I may go back and insulate the floor with foam board insulation also. For now, I am calling it quits.

The final step was to add an additional 15" of blown in loose fill insulation to the attic area.

Attic showing additional blown-in loose fill.


I am looking forward to having Erik North back next week to evaluate our home and get the rebate into the State.


More than that, I anticipate we will be much more comfortable this winter while using less oil to heat our home.

Cheers,

Mark

Saturday, November 6, 2010

Air Sealing Electrical Outlets on Exterior Walls

Have you ever noticed a cold draft when plugging or unplugging something on a bitter cold morning? I have at my house. This is a sure sign that you need you need to air seal and insulate!

Standard 2x6 construction means an electrical box leaves little room for insulation in exterior walls. As soon as you have a hole in the wall, you have a path for air to move, and you are making a hole in the wall for electrical service.

This is a reasonable job that doesn’t require a lot of money, but it does take some time to do correctly. Each outlet only takes 2-3 minutes, but moving furniture to access all of them adds a lot of time to the job and if done right, you can't see the change.

What you’ll need:

Screwdriver,
Caulk,
Outlet foam insulation,
Damp cloth.

The process is simple, remove faceplate and fit the gasket to the back of the faceplate (trim as needed).Then make a thin line of caulk on the back of the gasket. Place back on wall and press down to get a tight fit. screw down the faceplate and wipe away any excess caulk.

I found this image online:

I am not using the child-proof covers or plug gaskets, but the wall gasket and caulk seem to stop drafts.

Cheers,

Mark