When I started this home efficiency retrofit, I thought I would have trouble hitting the 25% improvement minimum. Now with the heat pump water heater (see photo prior to plumbing hookup), the Real Home Analyzer software is projecting we’ll be at 34%. WOW!
 |
| Our new heat pump water heater! |
Let’s look at the air sealing component in greater detail. The majority can be done by you. In fact everything you see here I did to remedy the air flow problems in my home (for details see http://wormmainea.blogspot.com/2010/08/home-efficiency-2010-continued-flir.html).
Air Sealing the Attic Access Hatch
All you have to do is add insulation to the top of the access hatch and make a secure seal (gasket) around the lid. In this case, I added 4” of rigid foam insulation to the top (glued to the plywood) and glued the fiberglass pad on top of that. To the surround, I added some self stick gasket. Also, I added some blots and wing nuts to make the attic hatch compress the gasket to make a secure seal. This looks the same from inside my closet (not that it matters much)-- all you can see is the ends of the bolts and wing nuts. See photo of finished product.
 |
| Nice and tight-- no more dancing attic hatch on windy days. |
Air Sealing the Sill Plate
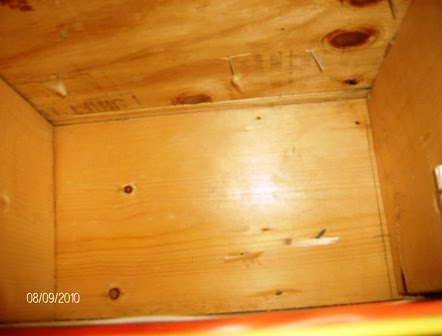
This is a bit trickier, but only because my basement is semi-finished. Often the photos and instructions you see online are homes where there is no impediment to air sealing. In my house I had to remove the floor insulation and cover.
 |
| Floor insulation and cover hanging to access the sill plate area. |
With that out of the way, you can see the sill area-- the sill itself is behind that batt of the fiberglass insulation-- remember the fiberglass is not inhibiting air flow, it is only filtering it. Fiberglass insulation is only effective if you have controlled air flow. In my house, I had to work around plumbing & heating pipes, electrical, phone & cable lines-- all of which were typically located in this area. Not a big deal, but it made the job a bit trickier.
 |
| Sill area exposed-- note all the utility service lines. |
Now you remove all those batts of insulation-- I dropped mine on the floor while I worked.
 |
| Insulation batt that will be replaced after air sealing. |
|
|
|
Now we can see the sill plate. It is a little tricky in this photo, but he bottom of this piece of wood is resting on the top of the cement basement wall. The size of these areas (in general-- some are smaller!) is approximately (and a little larger than) 9" x 14.5".
 |
| Sill plate area exposed. |
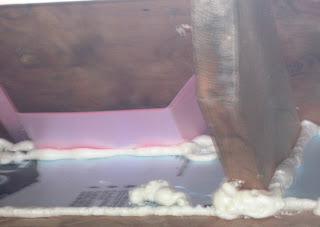
So I cut a bunch of pieces of 1/2" rigid foam board insulation to that size. These fit the holes (mostly) and left a little space for spray foam. The finished job is shown in the next photo. To control airflow I tried to really have the cement area covered with the blue insulation and spray foam.
 |
| Air sealing is complete-- HOORAY! |
After the spray foam hardens, go back and add the batt of insulation and replace the floor insulation and covering. Now the job is completely finished.
Air Sealing the Chimney Chase (in the basement)
This was easy and really necessary-- we had a noticeable draft here that you could feel with your hand. Because the chase is in a flammable zone, you have to use fireproof caulk and spray foam. It is twice as expensive as regular, but it is easy to work with and you don't need a lot. All you need to do is seal the spaces around the aluminum pieces.
 |
| Air sealed chimney chase in basement. |
 |
| Close up of sealed chimney chase in basement. |
At some point (when the sun is not so strong), I will go up to the attic to seal the top side of the chimney chase the same way.
While you have the basement ceiling pulled open, check that your utility holes are sealed. The oil service holes were not sealed well, so I gently removed the old caulk and sealed them up with spray foam.
 |
| Air sealing the oil access holes. |
Next weekend I will tackle air sealing the electrical outlets on the first and second floors.
Cheers,
Mark


